Having worked on two Nerf Mavericks, I decided it was fun to modify/repaint/fiddle randomly with stuff. I've always enjoyed making stuff out in the garage, and this allows me to scratch that itch. Anywho, for my next Nerf blaster I decided to go with a Nitefinder. I'd read a lot of good things about it on nerfhaven.com, primarily focused on the easy mod potential for it, as well as great performance. So, I hopped over to my local Target and picked one up for about $6. Oh yeah, did I mention they're dirt cheap? No? Well now I have. Obligatory pre-work stock blaster photo:
With that out of the way, let's begin. Initially, this blaster annoyed the crap out of me. Why, you ask? Because the main barrel assembly, pictured below, is supposed to separate and come apart easily.
However, apparently that feature is only present in some older versions of the blaster. The brand-new one I bought had the whole barrel assembly glued together. Annoying. So, after a few hours of fun time with my exacto knife, I was able to cut through the glue and separate the barrel out into its component pieces.
After this, everything went much smoother. Outside of having to smooth out the hole pictured above, the entire air restrictor assembly just fell out, which meant I didn't have to whip out the power drill. At this point the blaster was modified as much as I wanted, but I needed to get the rest of the pieces out of the inside before I could being taping and painting. This was especially true for the electronics. The Nitefinder has an LED "laser sight" built into it for kicks. Doesn't really work beyond 15 feet or so, but it's somewhat neat regardless (another pie in the sky idea of mine is to replace it with a real laser pointer someday).
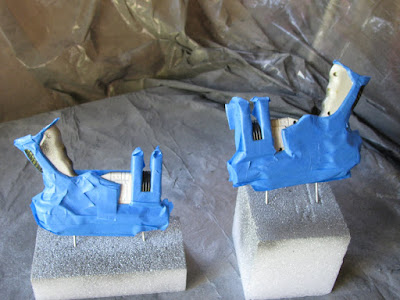
After taking everything out, it's painting time! I didn't really like how the vinyl dye gray color I used on my v2 Maverick turned out, so I decided to forgo it for this blaster and instead use the Rustoleum Hammered Silver I had picked up for my v1 Maverick. Having a better idea of what I was doing this time around I was pretty sure I could make it work without issue. And so, I set about with the painting process. Oh, one other big change I made with this blaster was how I went about mounting the parts. My earlier plan of using cardboard boxes didn't work very well, and so I settled upon using big foam blocks that you might use in floral displays and whatnot. They're super cheap at the dollar store, and while they'll eventually need replacing, they last for quite a while. I also picked up a pack of driftwood sticks from my local JoAnn Fabrics which, when snapped in half, make fantastic mounting tools. And, of course, lots of blue painter's tape.
I'm giving the inside a light coat of black vinyl dye because I noticed with my v2 Maverick that sometimes the seams don't match up 100%, and doing this prevents the original color from showing through.
That ought to give a general idea of the lightness of the coats of vinyl dye you have to apply. Eventually you end up with a solid color. And it's only 20-30 minutes between coats, so it doesn't really take as long as you might imagine. Anyway, once this phase was over I flipped over the main body, engaged in some strategic taping, and was ready to apply the silver!
With that done, I waited for the paint to finish drying, and then I took off all the paint, and then covered up all the silver so I could paint a few spots black for contrast. In hindsight, what I should have done was applied a black vinyl dye base coat to the front side as well, and then apply the silver over that. Would have saved me a needless step of taping, paiting, and eventual touching up. Oh well, information for the future!
At this point I was basically done, but I hadn't decided what I wanted to do about the circular areas on the blaster. Originally that's where Nerf had stamped their company name, and I had had thoughts about doing something wacky there, but ultimately decided against it. Since I had already used black paint to get the big areas, I really didn't feel like taping up the entire gun again (hindsight for the future here as well) and decided to just handpaint that circle black since I had a few touchup spots to address anyway.
With this all my painting was complete, sans a go-over with some clearcoat. Back to the shed!
Once that dried, the blaster was finished! I put it back together and unlike the v2 Maverick, everything actually worked! See, progress is possible if you keep working through the failures.
Also, I didn't re-paint the plunger draw because I couldn't figure out a good method to paint it without having to disassemble the entire plunger system. It also rubs a lot, and the paint probably would have left scuff marks. Some other things I learned from this project: better organization of paiting procedure, always sand down the area where the trigger moves (scuff marks again!), and that I can actually do this stuff and have it not fail. Always a good lesson, right?


No comments:
Post a Comment