At this point in my nerf blaster adventure, I had acquired several blasters, and modified/painted three of them, as you've read previously (in theory). I've also picked up a few tips and tricks, such as good spray paints, and the advantage of making a preliminary template. At this point I'd pretty much devoted myself to the hobby. I've always been a fan of fiddling around with making stuff, and my previous endeavors at translating the thoughts in my head to physical reality haven't gone well. But taking an existing object, modifying it, making it look sweet? I'm there, and I can actually do it!
Anywho, I started crusining eBay's listings every couple of days, looking for cheap, cool-looking blasters I could pick up that I didn't already have. What happened is that I expanded my Nerf collection pretty drastically with only a few purchases. One of the blasters I picked up several of is called the Crossfire/Strikefire. Sold solo, it's a Crossfire. Sold as part of a multi-pack promoting the "old" dart tag stuff, it's a Strikefire. Same blaster, different packinging I guess. Anyway, here's what it looks like.
The blaster in the picture is blue, but there are 3 other stock color options of red, green, and orange. Regardless, because of my prior Nerf blaster fun, a friend of mine at work asked if I could make her a tricked out blaster. I said sure (naturally) and she chose the Crossfire as her model of choice. With my new method of creating a template, I gave her a print-out and some colored pencils, and with that I had my color palette. Because of the colors she chose I'll be using Krylon Fusion again, because of the limited color choices with Vinyl Dye. Work start!
Oh look, it's the insides. This blaster started life colored red...but that will soon change. Muh ha ha!
As usual, the air restrictors were the first thing to go. For this blaster it's really easy to remove. Simply take this part of the barrel out, and drill straight through the back. First shot is pre-hole, second is after drilling finished.
Some blasters have this sort of tiny hole in the barrel, ostensibly as another method of preventing some power. Epoxy that sucker closed. More power, more fun!
Now that the basic modifications are done, it's time to rough up the body and remove some bits that will hamper the paint from sticking. Once that's done, it usually looks something like this.
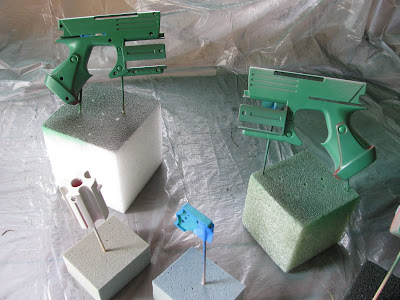
At this point all that remains is to tape the pieces to foam blocks and move them all to the designated painting party palace. Once there, work begins!
For this blaster, I decided to work it a bit smarter. I'd read a few tutorials on better painting procedure, and lo and behold, it made perfect sense. Basically, the idea is to paint the body whatever color will be used for the "secondary" and smaller parts. Once that dries, those small parts get taped up and sealed, and then you -repaint the body with whatever color it should be at the end. Might sound a bit backwards, but it's astoundingly easier to do it that way instead of the reverse. This is because way too often, those small pieces are really hard to tape off such that their color doesn't get on the bigger sections, but it works great to do it this way.
See how nice that looks? I'm a big fan of this method now. Anyway, at this point it's time for a light coat of clearcoat to help preserve the paint and attempt to diminish the rub-off tendencies of this particular model.
At this point the blaster is done being painted, and just needs to be put back together.
I really like how it turned out. I didn't sand the slide down quite enough, so there's a bit of paint rub-off there, but my friend doesn't mind. All in all, she has seemed to be quite delighted with how it turned out, and so am I. First commission, finished!


No comments:
Post a Comment