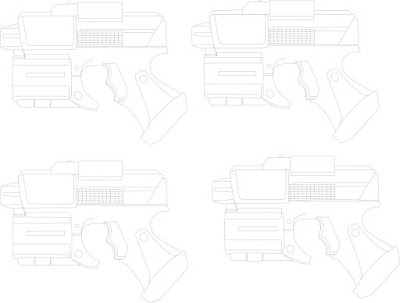
I chose to use a Crossfire for this project for a couple reasons. First and foremost, I had about 5 of them, and I didn't have plans for all of them. Second, they're really cool blasters. They prime by cocking the slide, and have decent ranges and power to boot. It's a win-win! Now, my mom's favorite color is green, so I decided to go with a very simple color scheme of black and green. As is my routine these days, I made a template!

Blaster is now smooth like baby's bottom. Very nice, yes. At this point you probably know the routine. Take out the air restrictor, stick the pieces on blocks, and it's out to the shed we go.
My plan going in to this blaster was to do a gloss black vinyl dye base coat, and then choose some select sections to do again with a nice glossy green coat of krylon fusion. And so it began.
Unfortunately, that plan didn't go well. Because I was doing this in mid-december, it was quite, quite cold outside, and very rainy.
It's hard to see the rain coming down, but take my word for it, the clouds are dumping buckets. As for the cold, well, this is what I looked like during the process.
Yes, I have a respirator now. More on that later. Back to the project at hand, the vinyl dye, either because I had screwed up some part of the process, or more likely due to the cold and poor humidity, didn't cure even remotely close to how it should look. It might be hard to see in the pictures above, but it dried in a very splotchy, non-glossy and non-good looking pattern. I tried to fix it (by rushing the pieces indoors right after application), but it wasn't happening. So, I shifted tactics and since the vinyl dye would serve as a decent base coat (because vinyl dye doesn't add layers or thickness) I applied a light coat of gloss black krylon fusion over it. Success! It didn't have the same curing problems as the vinyl dye, and turned out exactly like I wanted. I could now proceed with the project.
Remember that tiny hole of annoying air leakage from a prior post? Yep, it got epoxy-sealed too. Also, this blaster got taped in the opposite method from the one I did previously for a work friend. Compare and contrast the tape applied, and I think you'll see why the other method is far easier to pull off. Anyway, after applying the green paint all I had to do was wait for the paint to dry completely, and then it was time to put it all back together. Also, learning from my prior Crossfire experience, I did a much more thorough job of sanding down the points of articulation, so this blaster has almost zero paint rub-off. Check it out!
I gave this blaster to my mom on Christmas, not as a holiday gift, but just because it was the next time I saw her after I finished making the blaster. She was thrilled, and enjoys it a lot!
Oh, and as a quick disclaimer, I'm not promoting Rozerem, the plates are just some disposable plates I found at work that I took home to use for stuff like this.
Anyway, as my final thought I'm going to talk about my respirator. This project was one of the first ones I was able to use my respirator on, and it's fantastic. Before this I hadn't used any sort of air filtration, and I had noticed that after a long day of spray painting in a small, confined space, I would have a massive, raging headache (I don't ever get headaches naturally). So I eventually broke down and bought a respirator. And it is 100% effective. No headache, no more contact high off paint fumes. I should have bought one a long, long time ago. If you plan on doing anything involving spray paint, spend the money to get a good one. Don't buy those stupid little masks you see in the doctor's office, they have been scientifically proven to do exactly nothing. Get one like mine, that actually blocks particles from reaching your mouth and nose. I can't breathe through my nose with it on, I have to use my mouth instead, but it's well worth it to avoid killing off brain cells. Masks are great. /rantoff


No comments:
Post a Comment